nopCommerce Channel Integration
This guide will help you integrate your nopCommerce store (supported versions are 4.60, 4.70, & 4.80) with Listock. Once connected, you can efficiently manage orders, shipping, and payments through your Listock dashboard.
Installation Steps
- Create your Listock account at https://listock.biz/SignUp. You’ll use these credentials later to connect your nopCommerce store.
- Download the Listock plugin - version 4.60, version 4.70 or version 4.80.
- Log in to your nopCommerce Administration panel.
-
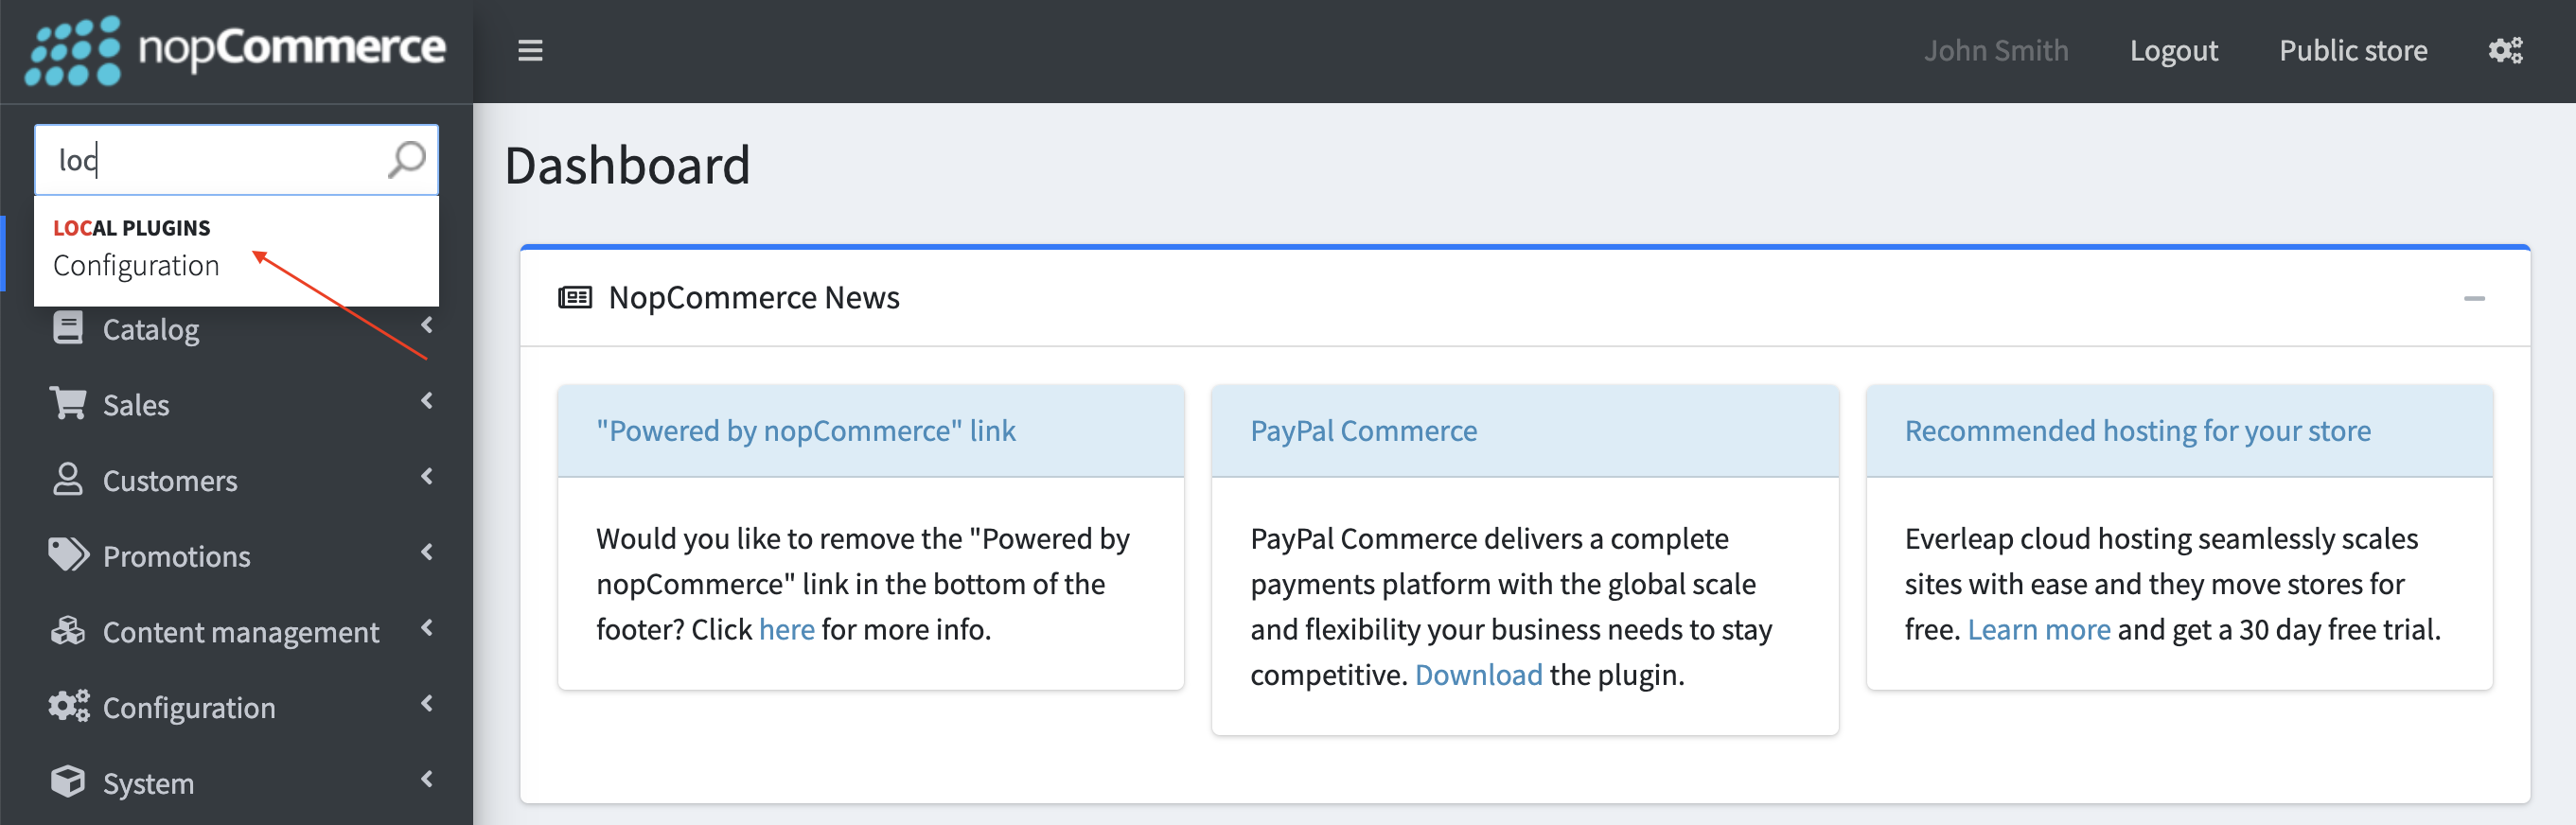
Navigate to Configuration > Local plugins.
-
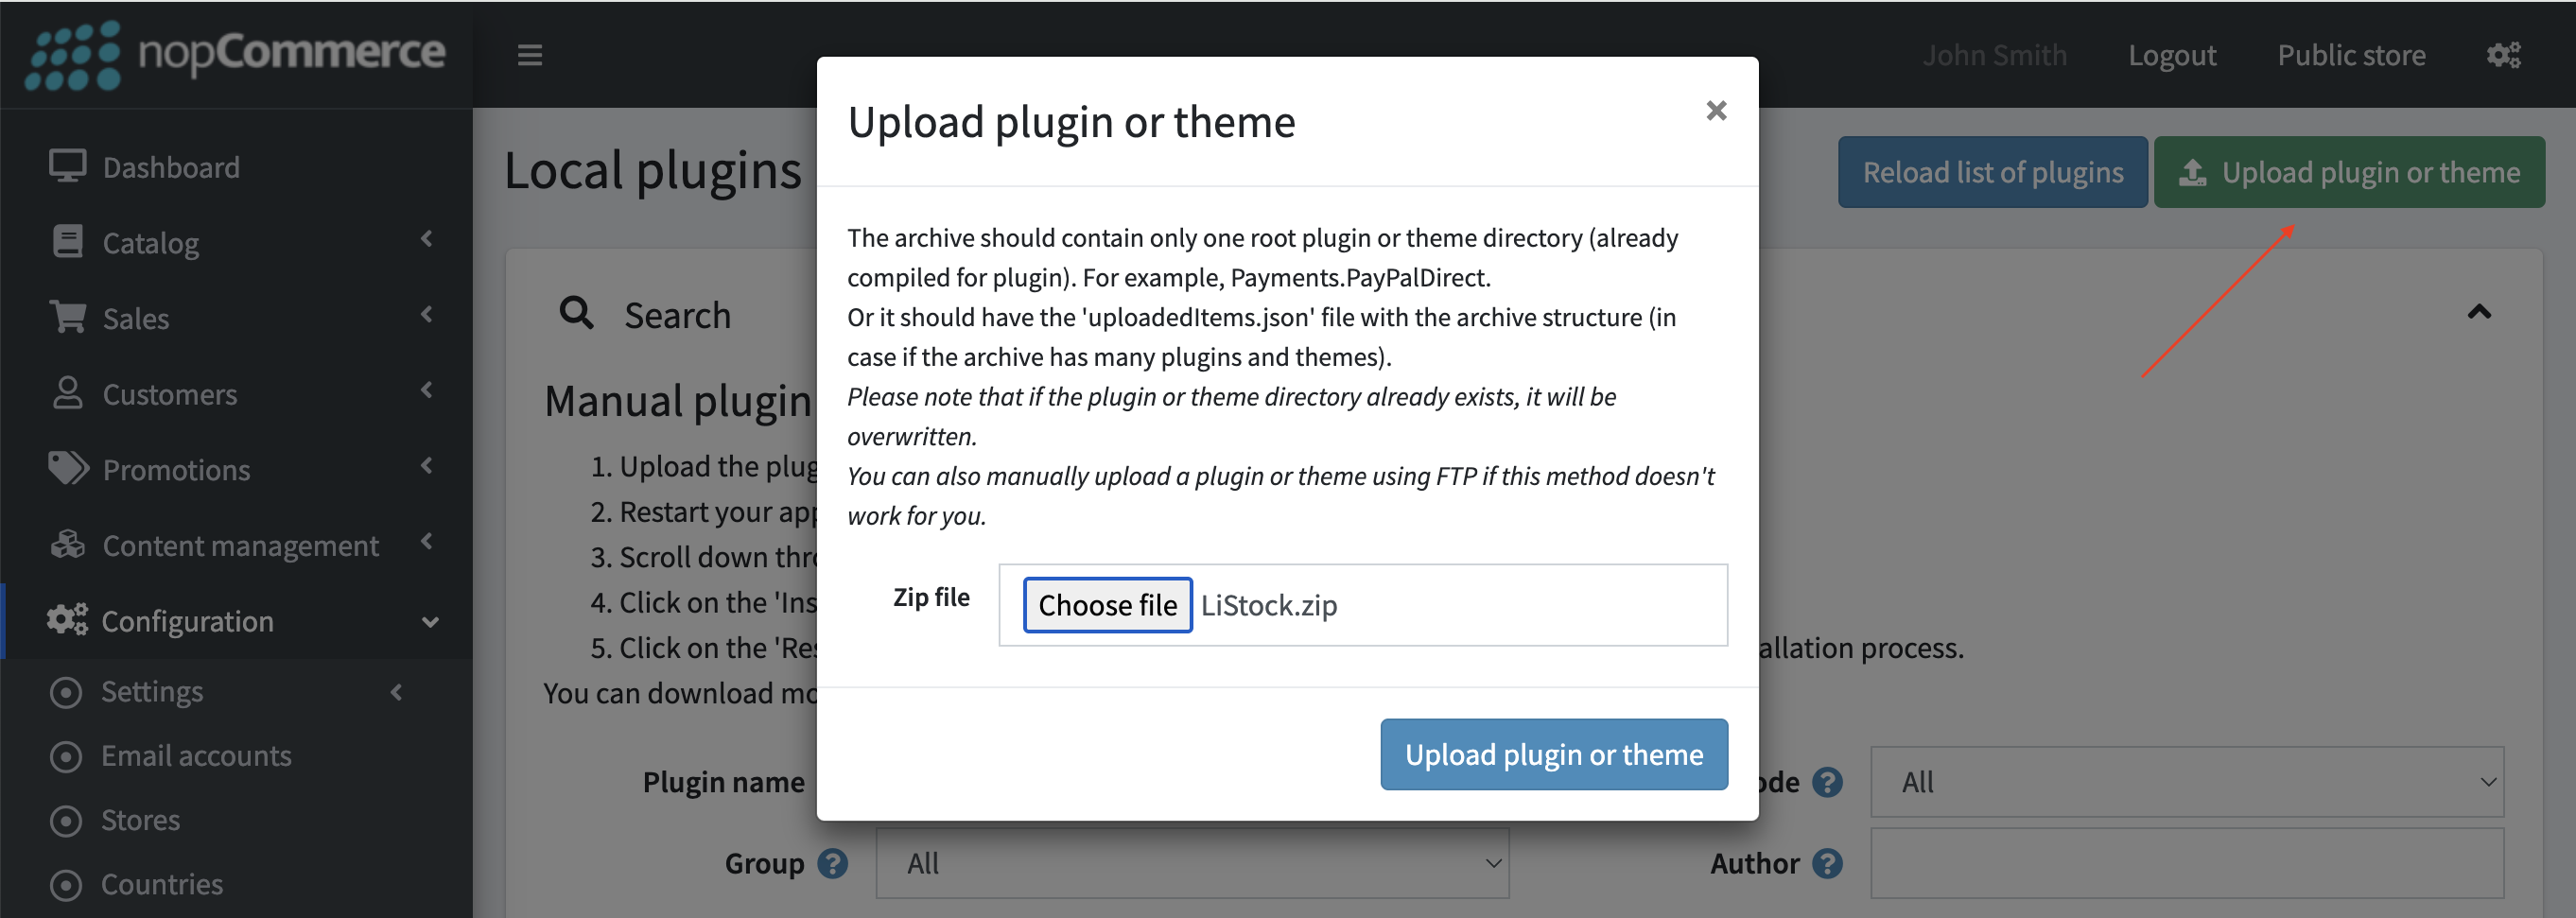
Click Upload plugin or theme and select the ZIP file you downloaded in Step 1.
- Once uploaded, in the top panel, click Restart application to apply changes.
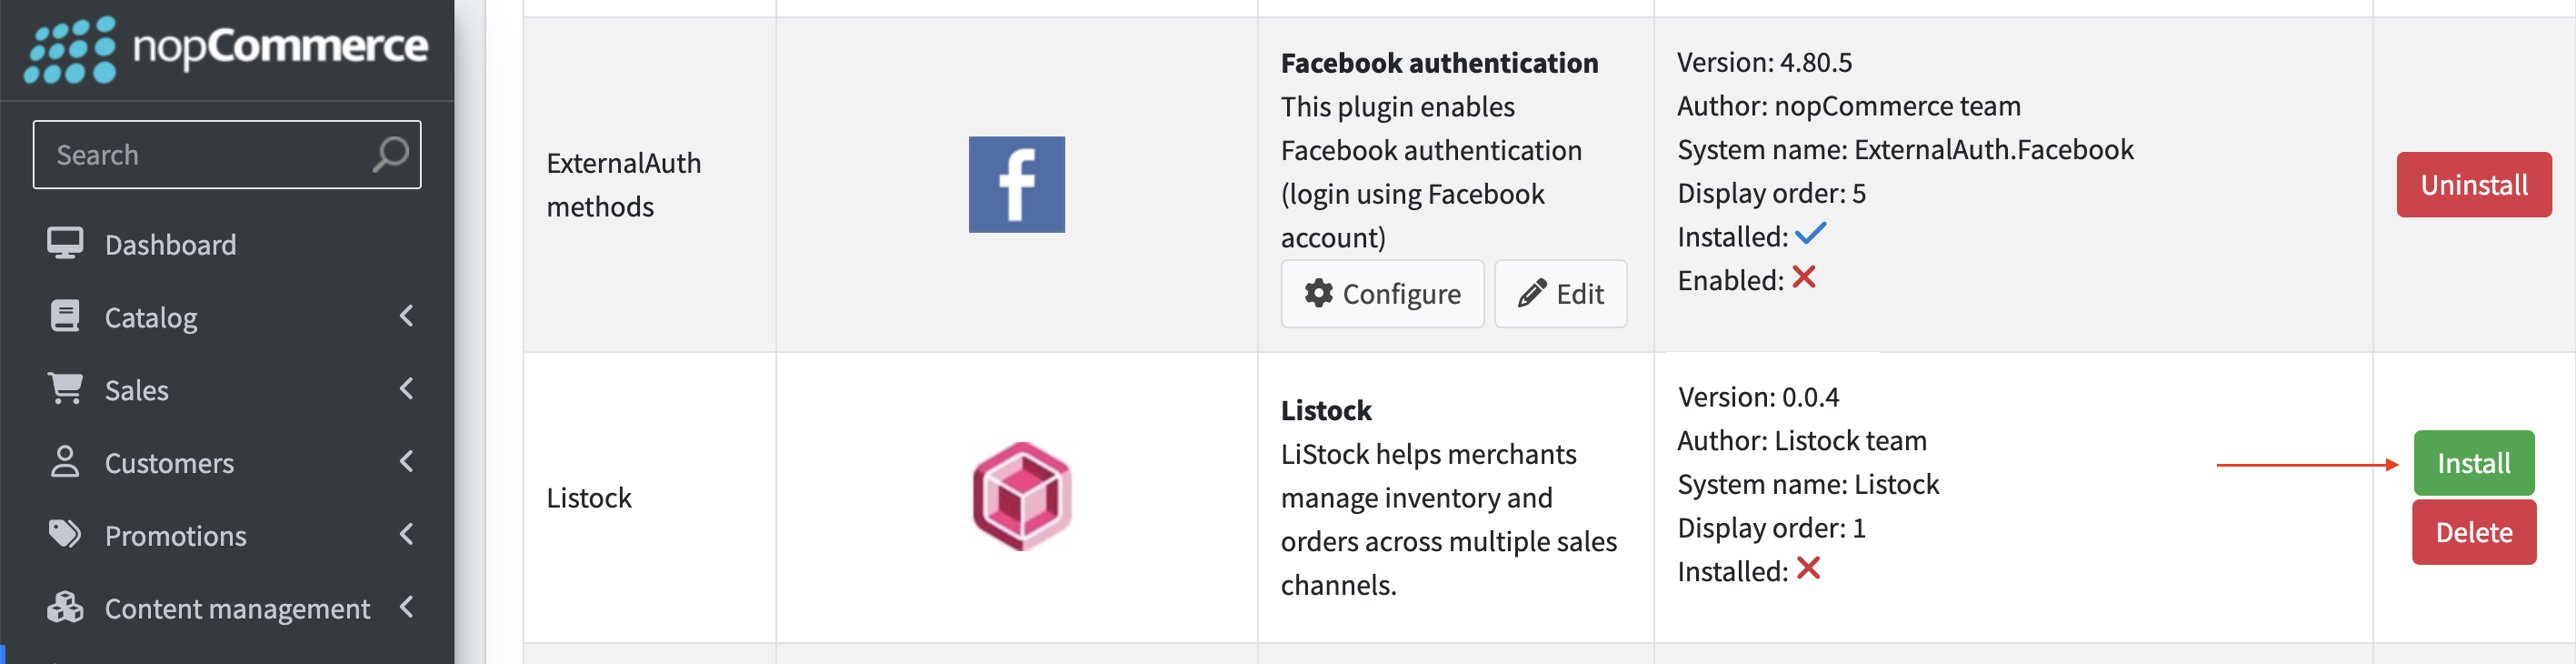
- Locate the Listock plugin in the plugin list.
-
Click Install.
- After installation, in the top panel, click Restart application to apply changes again.
-
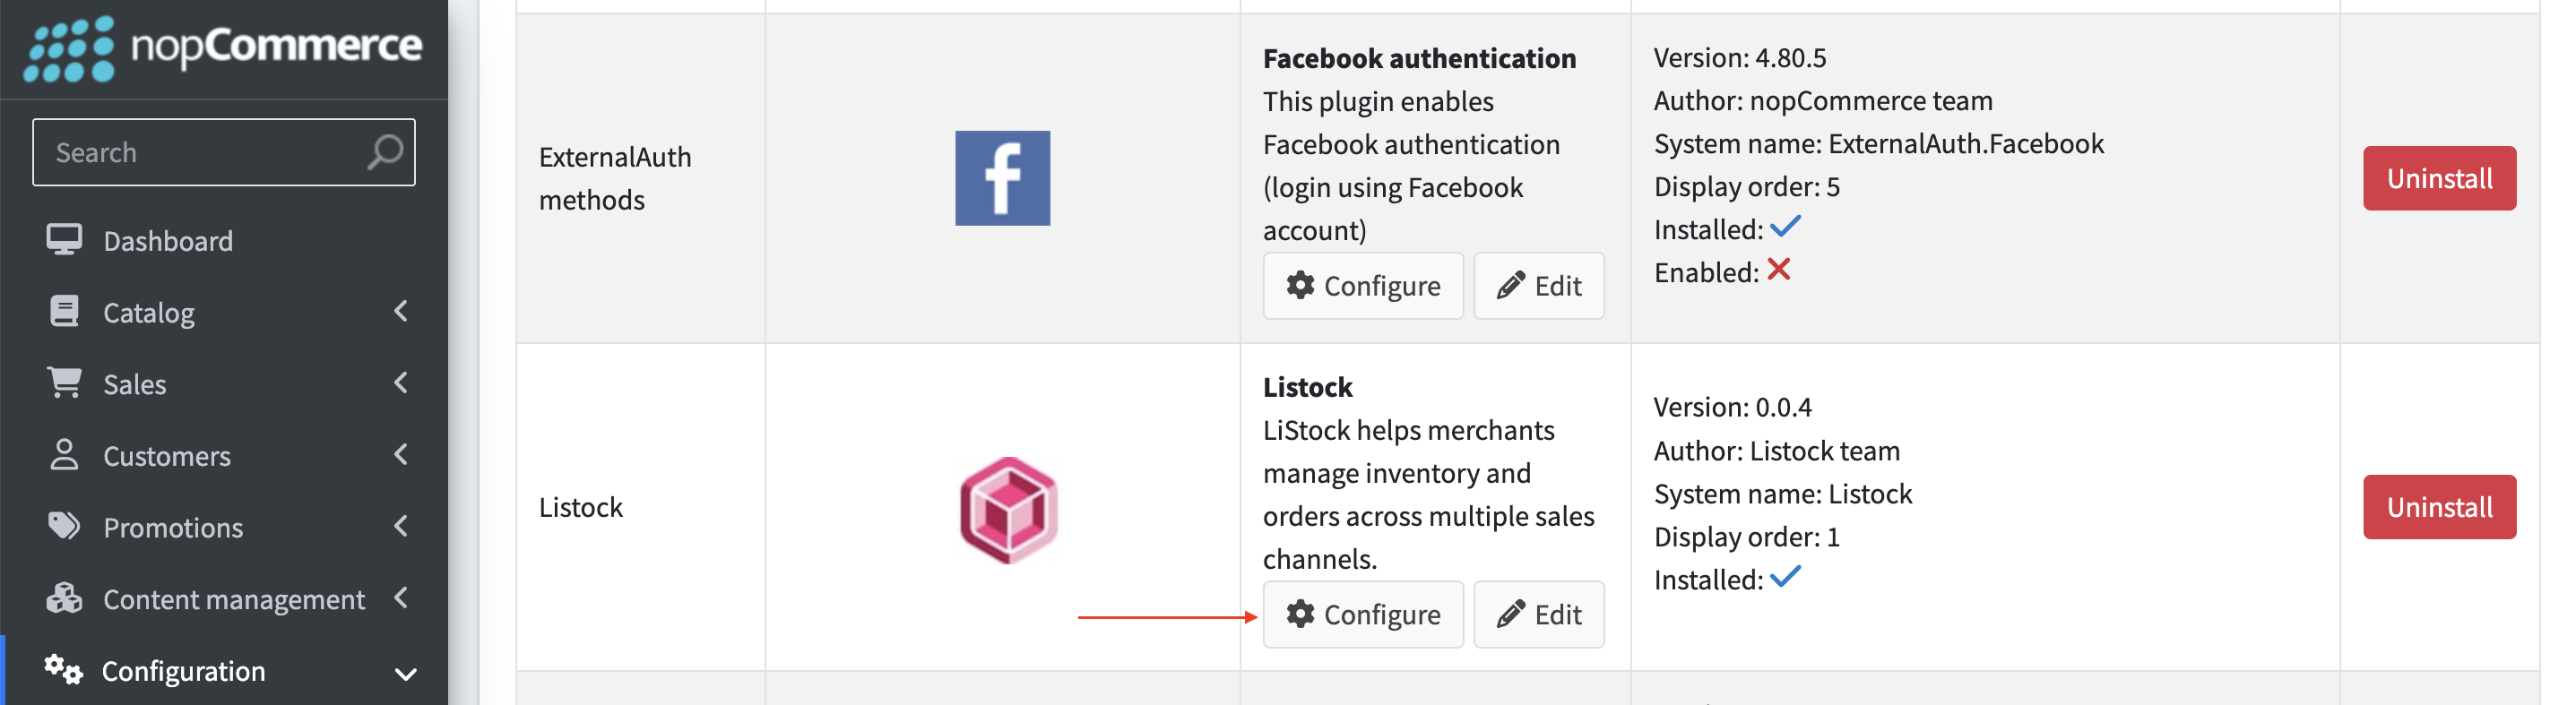
Then click Configure next to the Listock plugin.
-
On the plugin settings page, click Connect to be forwarded to the Listock Admin panel.

-
Sign in to Listock, then on the Admin page click Connect again to complete the integration.
After Integration
- Your nopCommerce store will be synced with Listock.
- New orders, shipping updates, and payment statuses will be transmitted automatically.
- You can manage everything from a single dashboard.
Need help? Contact our support team or use the live chat in your Listock admin panel.